PostgREST scenario introduction
In this scenario, we download some data into a Postgres database, then use PostgREST - a tool to make Postgres tables accessible via REST API - to expose this data and run a simple request to view the results.
Database set-up
Let's start by setting up the database. Access your KRM instance and Postgres DBs on the left menu, then click Create.
Name: This is just an identifier for Kubernetes. Typemy-db.Database: The actual name on the database. Typemydb.- Toggle on
Drop on delete, which conveniently deletes the database when you delete the custom resource.
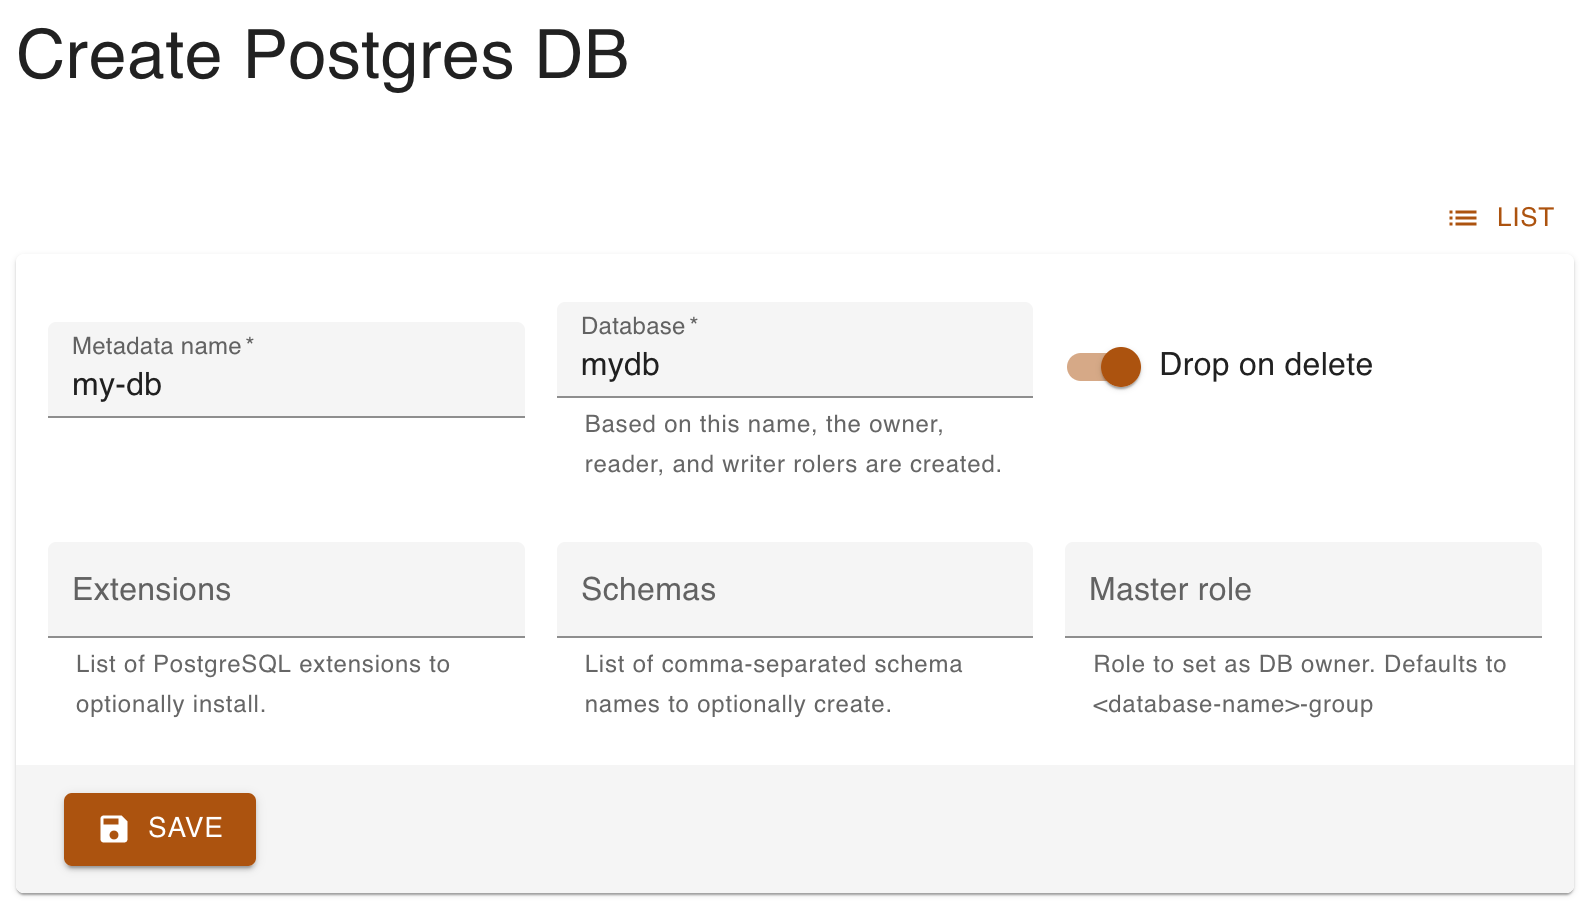
Click Save. You should now see your database listed.
Add users to database
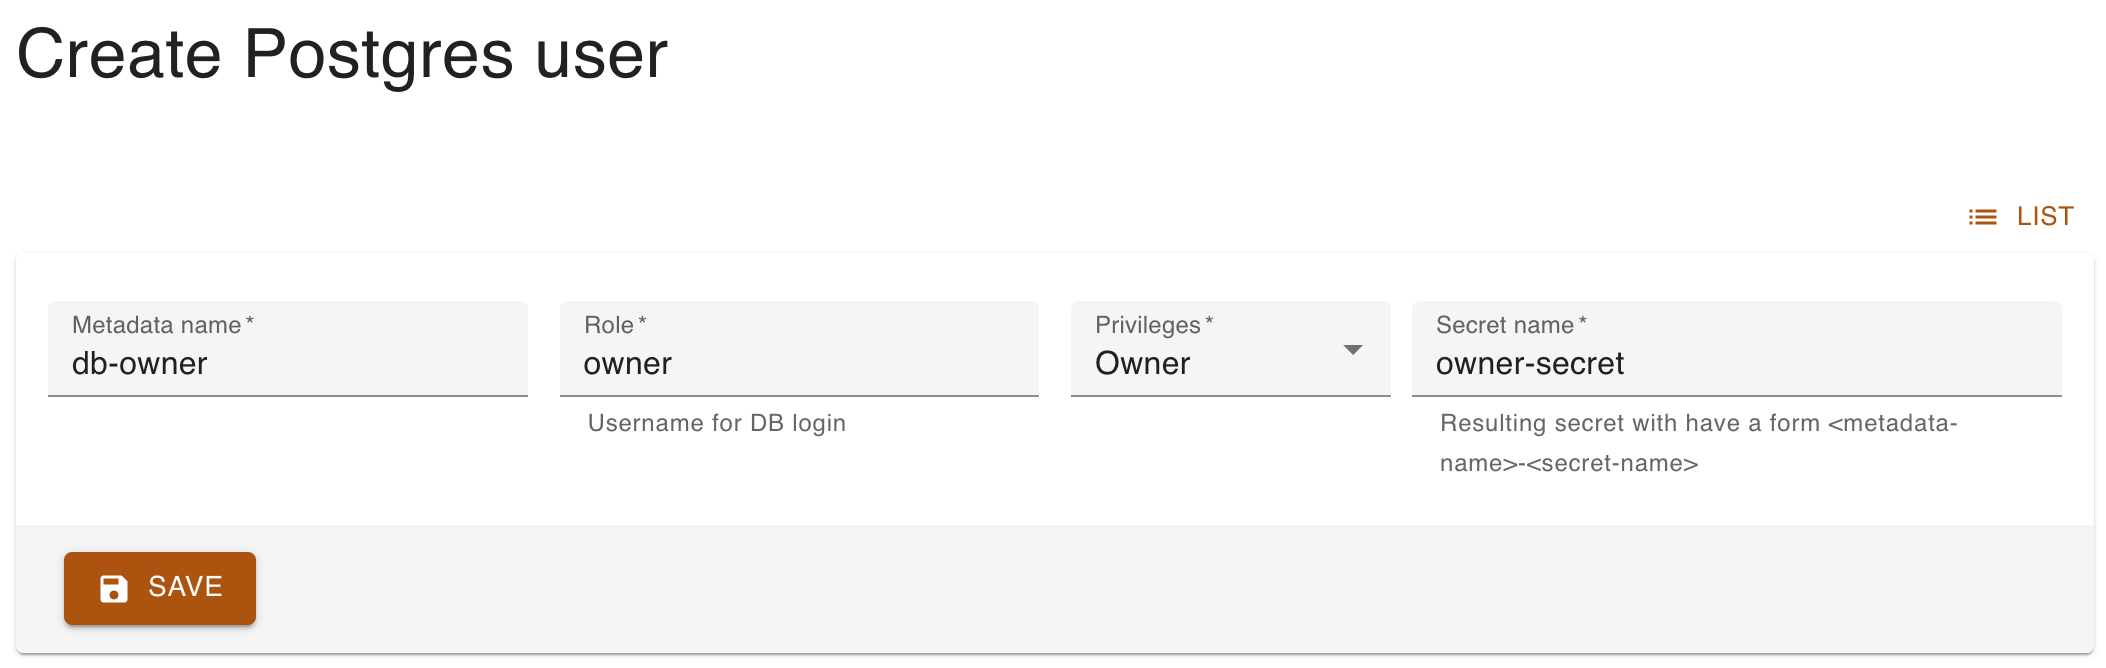
Click Show on your database's entry and then Add user on the bottom. We will create two users: PostgREST needs one to authenticate and another to assume its role when the API is called.
Create the first one as follows:
Name: An identifier for Kubernetes. Typedb-owner.Role: The actual name on the database. Typeowner.Privileges: Indicates what privileges the user will have. PickOwner.Secret name: The secret to authenticate the user. Typeowner.
Add a second user. This one will only be able to read data.
Name: An identifier for Kubernetes. Typedb-reader.Role: The actual name on the database. Typereader.Privileges: Indicates what privileges the user will have. PickReader.Secret name: The secret to authenticate the user. Typereader.
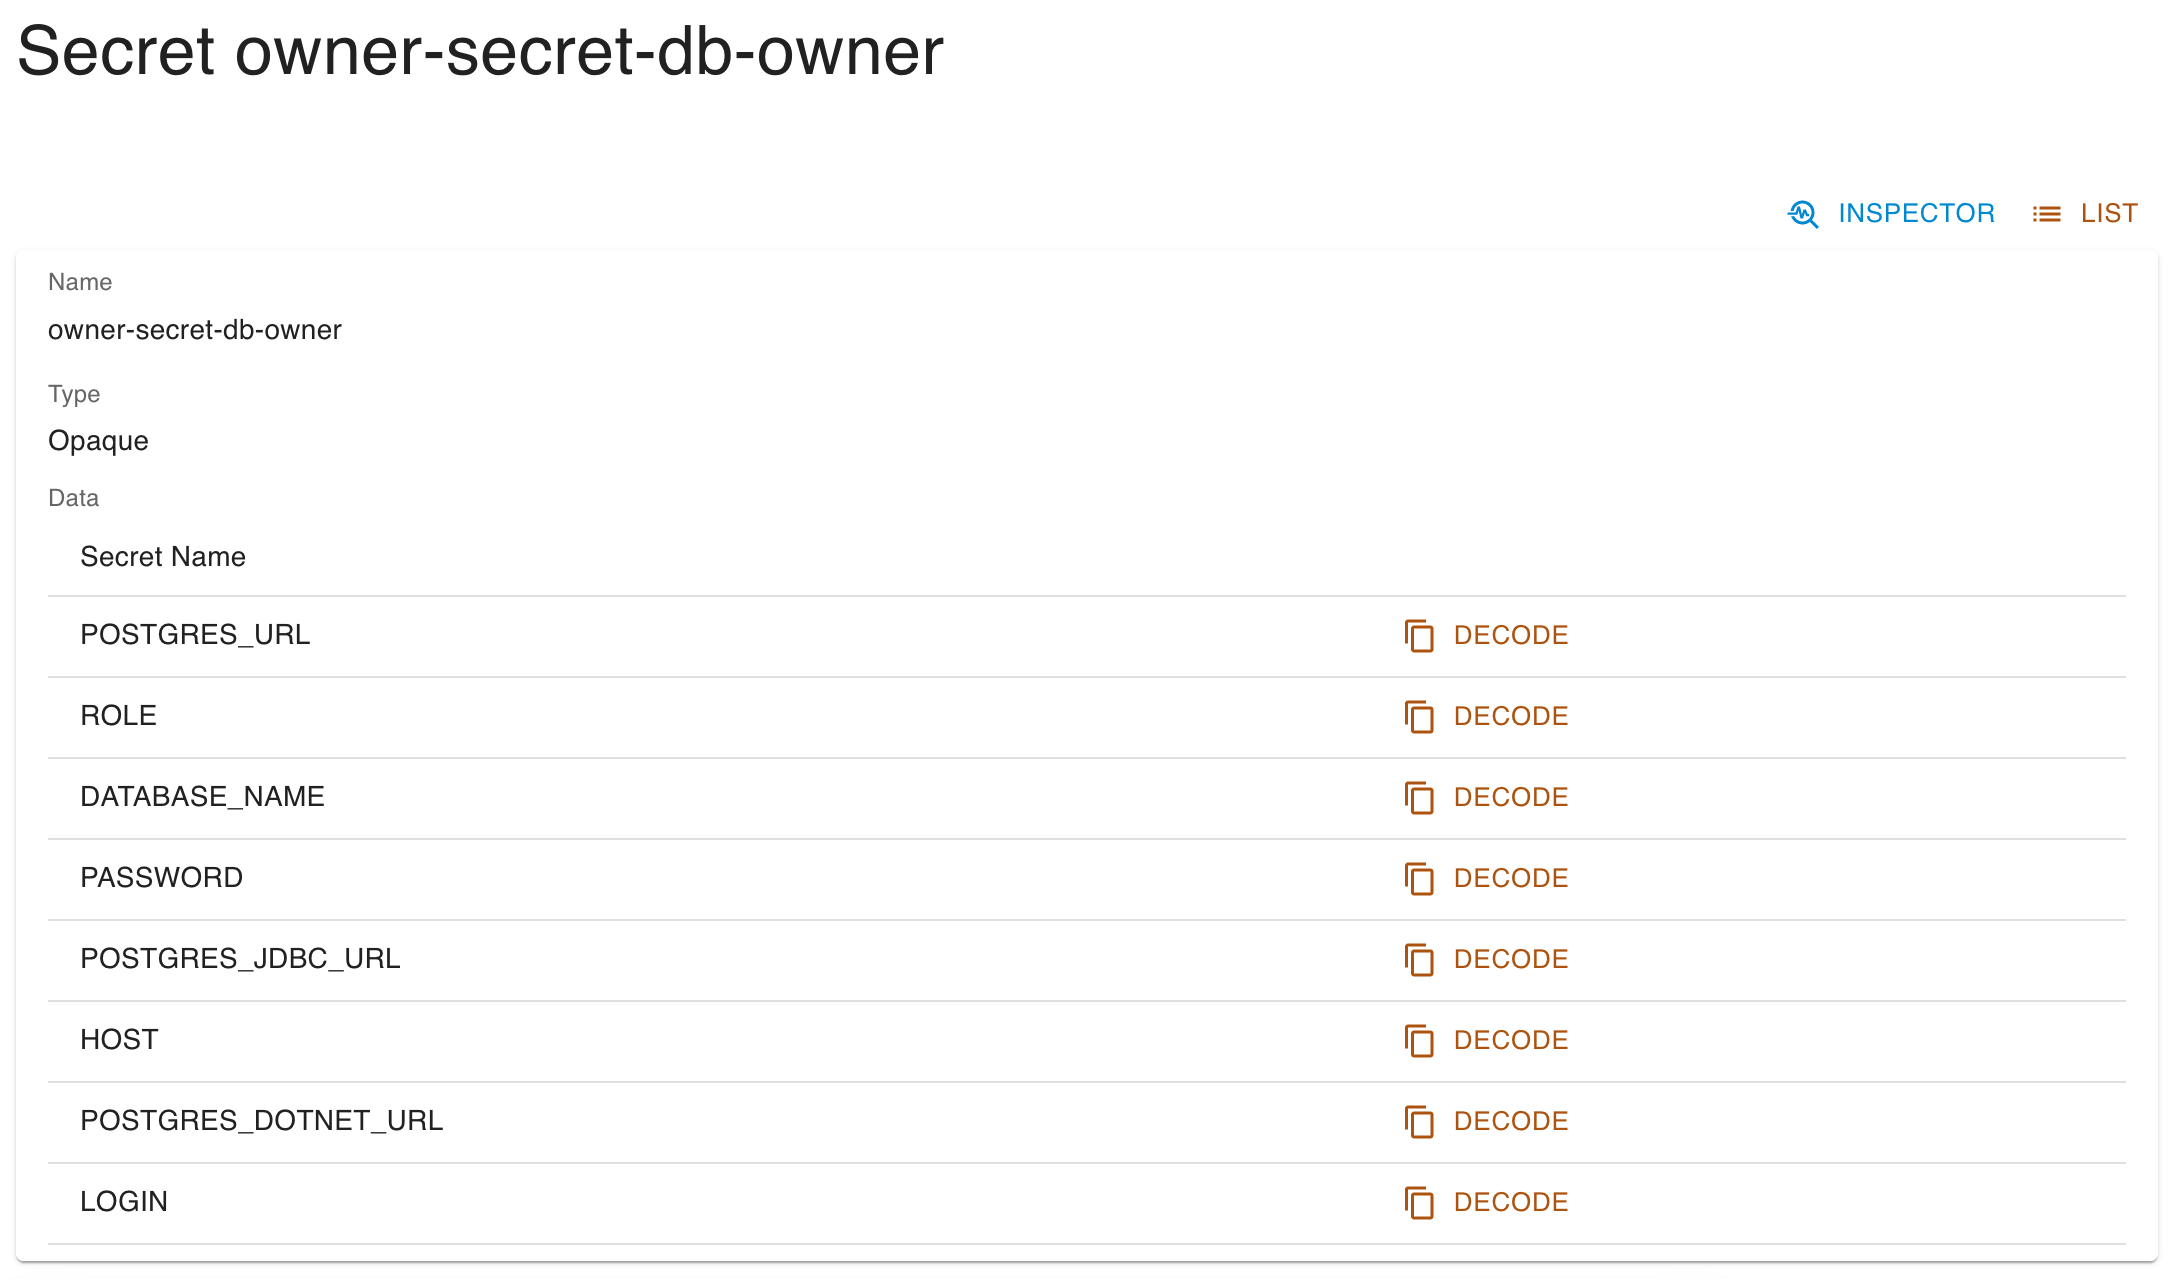
Retrieve POSTGRES_URL
Together with the users, two secrets have also been created. Go to Secrets on the left menu; the list should contain two secrets with names referring the users you created.
Look for the owner's secret, click Show and then Decode on the POSTGRES_URL entry. It will automatically copy the connection string to the clipboard. Write this down somewhere, as we will use it to log into the database and insert some data.